
With tie-dye shirts and apparel making a comeback, many hobbyists and screen printing enthusiasts wonder how they can customize tie-dye clothing for their unique tastes. Sometimes, small businesses want to capture the free-spirited energy of tie-dye clothing to accompany their brand imagery.
Screen printing is a fantastic way to get your logo or brand onto a t-shirt or other piece of clothing. Using minimal equipment and expertise, you can get your logo printed on many shirts your customers can wear to be ambassadors for your product or service.
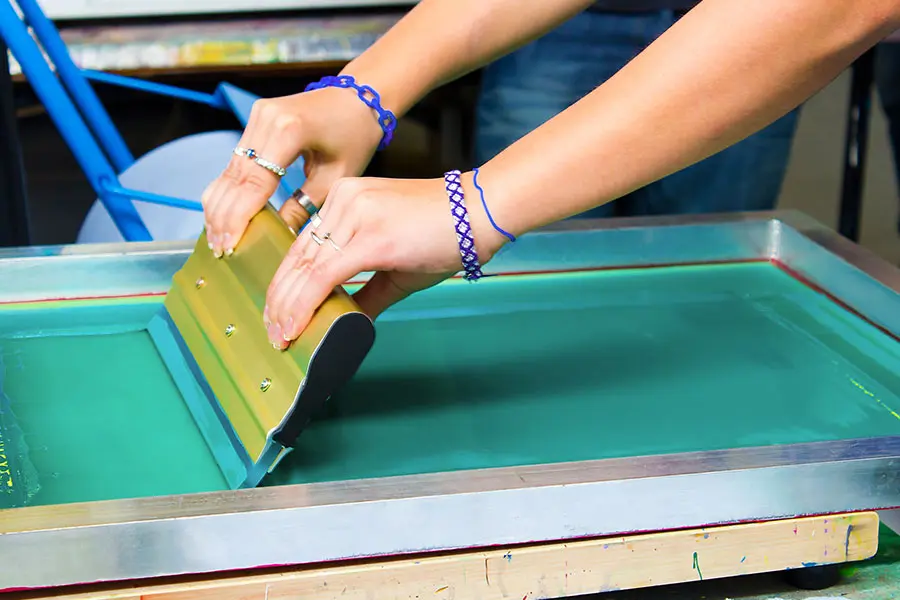
Screen printing requires basic skills, knowledge, and equipment despite relatively low entry barriers. In essence, screen printing uses a mesh and stencil screen printer to press ink onto a substrate such as clothing. Then, a blade or squeegee presses ink onto the substrate through gaps in the stencil, producing a specific pattern or design.
Press one color of ink onto the substrate at a time. That means performing several rounds of screen printing if multiple printing colors are necessary. Furthermore, printed ink must dry before screen printing another color or design on the same substrate.
Another factor that complicates the screen printing process on shirts is other colors or dyes that are present or require incorporation into the shirt besides the printed design. Therefore, especially true for clothing with many different bright colors because these colored dyes can sometimes bleed into the print. As a result, screen printing on tie-dye clothing can be complex, so let’s dive into a quick guide on screen printing on tie-dye to address some of these challenges.
Print After Dyeing
Many individuals and businesses wishing to print their logo on a shirt choose to tie-dye it to add fun colors and patterns. The tie-dye process involves folding the shirt into particular ways and then splashing or pouring different colored dyes onto other parts of the shirt. When unfolding the shirt and the stain dries, it yields a unique and complex pattern of colors depending on the method of folding the shirt.
When combining a tie-dye or other colorful pattern, such as Bella + Canvas, with a printed logo or design on a shirt, one crucial factor is the order in which the process should take place. For example, some designers might print a logo on a shirt before tie-dyeing it. This approach can work and produce a beautiful shirt.
However, when printing before tie-dyeing, you risk dye bleeding into the printed design or logo when the ink is drying. Therefore, the visibility of the printed design on the shirt needs to be clarified. So, it’s essential to use this approach only if you’re extremely careful not to get dye on the printed area or if you want to somehow incorporate the pigment into the printed design.
If you want to ensure dyes don’t bleed into a printed logo, you can reverse the process and complete the tie-dye process before applying the logo. With this approach, you would fold the shirt in the particular pattern you would like to see the colors take on, let that dye dry, and then unfold the shirt before putting it under a screen printer.
Ensure that your mesh and stencil are fixed to the screen printer and above the shirt. Next, use a squeegee to evenly spread the ink over the mesh and apply pressure to press the ink onto the shirt with sufficient force. Finally, hang the shirt up to let the ink dry, and before long, you’ll have a tie-dye shirt with your printed logo or design included.
Put Thought Into Color Combinations and Distribution
Consider screen printing on tie-dye shirts or fabric as the color combination that makes sense from a design and aesthetic perspective regarding your tastes or brand. However, this isn’t always easy because you will complete the dying and printing processes separately, as stated earlier.
Moreover, predicting how a particular tie-dye pattern will take shape when dyeing a shirt can be difficult. As a result, it can be tough to imagine how a specific dye and print combination might look together. Sometimes, it can help to look at how particular color combinations look on models, especially since tie-dye patterns have again become popular among celebrities.
You can use many strategies to understand how dye and ink colors might look together. For example, consider the folding method of the shirt before applying the dye and how other shirts that utilized the same folding pattern looked after using the stain.
Another action you can take is to research color palettes that include the dyes and ink you plan to use and see whether these colors are compatible with the palette. Even machine learning engines only represent a selection of colors based on an input of given colors. As a result, this can be a great source of creative inspiration since many models dress up in tie-dye patterns by combining them with more formal attire.
A simple approach when starting is to use a more basic color of ink when screen printing. For example, when using dark-colored dyes, a simple method is using white ink. However, be mindful of the fabric color you print on, and use a contrasting color on the specific area on the printed shirt.
For example, if you are working with a white shirt when dyeing and white ink, you will need to make sure that darker dyes cover the area of the shirt that you plan to print on. Otherwise, the printed ink might not be visible. How many prints will you make on the shirt, and what is the position of each? For example, if you are printing ink on both the front and back of the shirt, which is quite common, you will have to cover both areas with a contrasting color of dye or fabric.
To sum up, tie-dye and screen printing can be terrific ways to create a memorable shirt or another article of clothing, as long as you are careful with the process. Make sure to dye before you print and put thought into your choice of pigment and ink before getting started.